 Accueil
 Rechercher
 S'enregistrer
 Connexion
VP 2025 - No. 311 Restoration
3 participants
Page 1 sur 1

VP 2025 - No. 311 Restoration
par NorAndy Ven 1 Oct 2021 - 14:21
Hi all!
So I finally got around to the 2025. Due to work and other projects it has been postponed, but now it refused to start and had a heavy smell of gasoline so it was about time to open it up.


I also have a few other ideas, and I'm sure things will pop up as I go.
Additionally I hope to get some license plates for it, but so far it seems like that would become a challenge. I might be able to get it certified as a tractor or similar, but I have been in touch with the government branch (DMV?) that handles that in Norway and I need to bring in to them for checkup before we can proceed.
I figure that before I do that, I will fix it up a bit. (And at least make it run. )
)


Removed most of the internals, and did some cleaning.


So I finally got around to the 2025. Due to work and other projects it has been postponed, but now it refused to start and had a heavy smell of gasoline so it was about time to open it up.


Some of the plans
Make it run again...
General maintenance. (Oil, filters, carburetor clean/rebuid, ++)
Fix some cracks in the shell
Replace tires
Replace windscreen
Add some gauges and fix some electrial issue
Improve the usability on water.
Make it run again...
General maintenance. (Oil, filters, carburetor clean/rebuid, ++)
Fix some cracks in the shell
Replace tires
Replace windscreen
Add some gauges and fix some electrial issue
Improve the usability on water.
I also have a few other ideas, and I'm sure things will pop up as I go.
Additionally I hope to get some license plates for it, but so far it seems like that would become a challenge. I might be able to get it certified as a tractor or similar, but I have been in touch with the government branch (DMV?) that handles that in Norway and I need to bring in to them for checkup before we can proceed.
I figure that before I do that, I will fix it up a bit. (And at least make it run.
Removed the shell. A bit dirty, but found nothing critical.
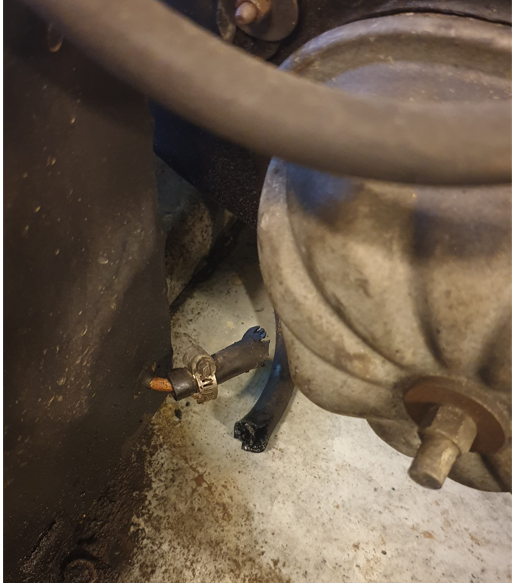
The exhaust is going to need some attention, tho..
The exhaust is going to need some attention, tho..

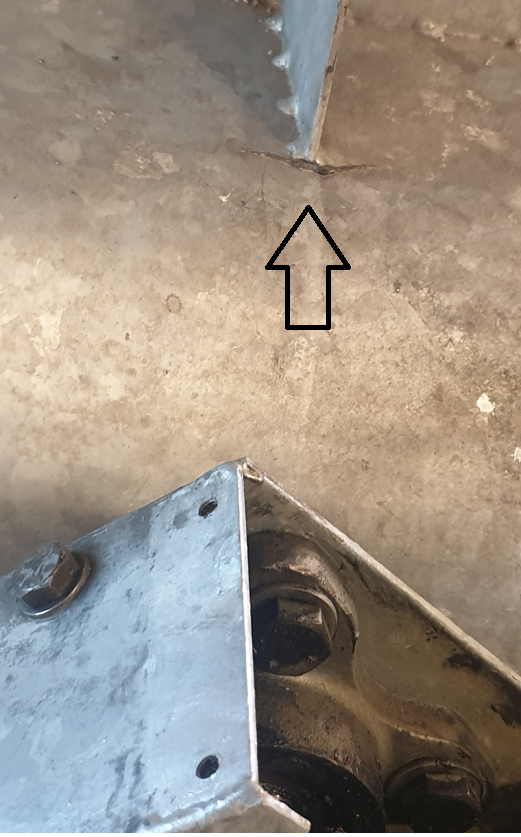
Small crack in the metal shell that will have to be welded.

The shell also needs some attention, as well as the electrical system.

I have a suspicion that this could be a cause of the fuel smell and the no-start contidion. 

Removed most of the internals, and did some cleaning.


So far so good.
NorAndy- Messages : 13
Date d'inscription : 12/02/2020
alligator et propylene aiment ce message
Re: VP 2025 - No. 311 Restoration
par propylene Ven 1 Oct 2021 - 21:44
Good job!
Indeed, it was a little leak
Indeed, it was a little leak

propylene- Admin
- Messages : 1593
Date d'inscription : 08/10/2014
Age : 46
Re: VP 2025 - No. 311 Restoration
par NorAndy Dim 17 Oct 2021 - 1:21
Thanks!
Hehe, yeah. I bet it will be a bit easier to start after that hose is replaced.
I have been able to spend some time on the VP lately and started with the engine.
Hehe, yeah. I bet it will be a bit easier to start after that hose is replaced.
I have been able to spend some time on the VP lately and started with the engine.

Began to tear it down to do some cleaning and general maintenance
The oilcooler was a bit dirty.

Thankfully a couple of rounds in the ultrasonic cleaner fixed it up pretty good.

Tried to cover the electronics as good as possible, took it outside and pressure washed it.

The carburetor had also seen better days.

Bought a Burton rebuild kit for it.

So I sent the carb. through the ultrasonic as well, and installed the kit.

Starting to put the engine together again. Took the valve covers off to check clearance and replace the gaskets.

Replaced sparkplugs, sparkplug cables, fuel, oil and air filter, front and rear main seal, valve cover gaskets, fan belt and fuel pump, and put it back where it belong.

I later found a sandwitch plate that fits this engine, and installed that to get oil pressure and temperature readings. The thread size on the oil filter is M16 x 1.5, for those wondering.


The fuel tank was in pretty good shape, but a bit rusty. Sanded it down, primed it, painted and installed a fuel level sensor.


The tires had good threads but were starting to show a lot of cracks, and the rims was a in a bad shape. The beads was a pain to break, and I was considering using the "redneck" way and put a 2x4 on them and drive my truck onto it, but finally got them off using the workshop press instead.

Sandblasted the rims first, but they got a bit rough texture from that treatment

So I ended up sanding them down with 400grit paper after blasting them. I did not have access to a lathe, so I "made" one.

At least they became more shiny!

And shinyness is very important of course, especially when you are about to cover it up in yellow primer.

Finally got them painted. Used a 2K polyurethane paint, should offer some resistance against water from those long days on the lake.


I thought I would put on the tires myself, and took a "Youtube degree" in how to change them.
But I bought Kenda 21x11.00-8 and let me tell you, the videos where they simply put a bit of lube on the sides and push the tires on by hand does not apply to these tires.
The whole ordeal was quite a workout.

But about two hours and a crushed thumb later they were done.

The hubs and chains seems to be fine, and after a 2 hours submerged in water I could not see any water in the chain housings so so I have decided not to take it apart for now.
Somewhat of a "if it ain't broken, don't fix it" kinda deal, I guess. As mentioned it has only 240 hours on the timer and from what I can see in the chain housing they are dry and rust free. So I tightened up the chain that goes from the axels and down a bit, put grease on all chains then brushed/sanded and painted the hubs.

If anything, the chains running to the front wheels on both sides seems to have a bit of play, but I have not found a way to tighten them yet. If anybody knows if that is possible, I would appreciate of you could let me know.
I also sandblasted, primed and painted the wheel bolts.

Then finally put the wheels back on. No more need for a jack trolley to move ol' 311 around.

These last couple of days I have moved over to the fibreglass top, but this post is already way to long so I'll end it here.

Cheers!
NorAndy- Messages : 13
Date d'inscription : 12/02/2020
propylene aime ce message

propylene- Admin
- Messages : 1593
Date d'inscription : 08/10/2014
Age : 46
Re: VP 2025 - No. 311 Restoration
par NorAndy Lun 25 Oct 2021 - 20:35
Thanks!
So I have gotten a bit underway with the "chassis". Took some time to decide how to do the layout of the dashboard, but once decided I started filling in the unused slots by laying woven fiberglass and epoxy.
So I have gotten a bit underway with the "chassis". Took some time to decide how to do the layout of the dashboard, but once decided I started filling in the unused slots by laying woven fiberglass and epoxy.

Also there was about 7 cracks in the top shell that needed to be reinforced, like this one on the driver side.

I sanded down the interior, and fixed some minor scratches and cracks with fiberglass putty.
..It was a lot of sanding.

Holes for the new switches/gauges was drilled/cut out.
Originally a hour-counter and voltage meter was installed.
The plan is to put in a fuel gauge, tachometer, oil temp, oil pressure as well as a new volt meter and hour counter.
The big hole is for switches.

I decided to spray the interior with bedliner, as I love the stuff.
I considered diluting it and spray it with a regular HVLP gun to get it smoother, but ended up using a undercoating gun at about 80PSI (Normally recommended 45-60PSI)and about 35-40cm distance which seemed to give a somewhat smoother texture than the normal "bedliner look", and I found that fitting for the interior.


The cracked windshield has been removed and a new one is waiting to be installed here, so the frame was sanded, primed and painted.
...with bedliner. Black this time.

As was the rollbar.

This time I went with a lower pressure (50 PSI) and different adjustment on the gun nozzle, to get slightly more texture. A bit difficult to spot in the picture, perhaps.

I am finished sanding the outside of the top shell as well, but with 400 grit.
I was thinking about using white bedliner for the exterior, but I have another plan..

In between applying filler and sanding, I have started on the electrical. The original setup was a switch for the bilge pump, heated window and air exhaust fans.

But I see now that this project is going a bit of track..
So for those who feels that vehicles should only be restored to original/stock or close to it, I do respect that but I would have to recommend abandoning thread at this point.

Seriously tho, I don't think I'll go completely off the rails but I have gotten a few ideas.
Still reading? Ok, cool!
I have replaced the stock fans for a couple of reasons, but mainly because I need the space. A bonus is power usage and availability, but mostly space. More on that later.

Painting the top exterior is up next, and working on the electrical. And on that note I'll end todays post with a preview of the new taillight setup being test fitted.

So long!
NorAndy- Messages : 13
Date d'inscription : 12/02/2020
propylene aime ce message

MAD06- Messages : 655
Date d'inscription : 04/03/2018
Age : 45
Localisation : nice
Re: VP 2025 - No. 311 Restoration
par propylene Mer 27 Oct 2021 - 19:29
Awsome!
Wich fan will your put on?
Nice rear lights! Where do they come from?
Wich fan will your put on?
Nice rear lights! Where do they come from?
propylene- Admin
- Messages : 1593
Date d'inscription : 08/10/2014
Age : 46
Re: VP 2025 - No. 311 Restoration
par NorAndy Sam 30 Oct 2021 - 4:02
Thanks!
The fans are engine bay fans mainly intended for boats with inboard engines.
They are designed for continuous operation and have a 3.6m3/min capacity.
They are available at "Biltema", a store chain I believe is only operating in Sweden, Norway, Denmark and Finland. But they seem to sometimes rebrand generic products, so similar (or even identical units under different labels) are surly to be found at other locations as well.
LINK - Biltema fan (In Norwegian)The fans are engine bay fans mainly intended for boats with inboard engines.
They are designed for continuous operation and have a 3.6m3/min capacity.
They are available at "Biltema", a store chain I believe is only operating in Sweden, Norway, Denmark and Finland. But they seem to sometimes rebrand generic products, so similar (or even identical units under different labels) are surly to be found at other locations as well.

I installed two, but I have pulled an additional cable and reserved locations and a switch for two more. I've considered installing those as input fans instead, under the engine cover.

I made blockoff plates in the air ducts, to prevent the fans from just picking up air from the outside and hoping that will improve flow through the engine bay.

I do believe that the stock fans had a higher capasity and tried to do some testing with an anemometer to compare the fans, to see if I was at least in the ballpark of the original airflow.
"Lo and behold", the super-scientific test setup.

I actually seem to have gotten a good reading on this test, but then I completely butchered the test of the stock fan.

I had an identical output on the backside of the "bucket" and was hoping to be able to force the air out of it. In hindsight that was ridicolus, since the surface area of the fan was to large, the bucket and hole too small and the air just ended up bouncing off the rear wall of the bucket and being forcing in reverse through the fan instead. Oh well, lesson learned.
Then I considering setting up a larger test tube instead of the bucket, but went with the "hand in front of the fan" test instead, and the conclusion was. "It blows pretty good." (Yay, science)
So now with an oil temperature sensor and an engine bay air-temperature sensor installed, I figure I will test running the VP with the current setup and eventually add two more fans if needed.
In addition I have introduced one more change that I also believe will reduce the engine bay heat, but I'll get back to that with pictures in the next post as I have none available now. Hopefully with that change the new fans will be able to keep up, but time will tell..
At least the good data I got from the test was that with a battery at 12.0V, the stock VP fan consumes approx. 4.9A when running unrestricted, and the new fan was at 1.9A.
Regarding the taillights, they are also from "Biltema".
LINK - Biltema tail lights (In Norwegian)Then I considering setting up a larger test tube instead of the bucket, but went with the "hand in front of the fan" test instead, and the conclusion was. "It blows pretty good." (Yay, science)
So now with an oil temperature sensor and an engine bay air-temperature sensor installed, I figure I will test running the VP with the current setup and eventually add two more fans if needed.
In addition I have introduced one more change that I also believe will reduce the engine bay heat, but I'll get back to that with pictures in the next post as I have none available now. Hopefully with that change the new fans will be able to keep up, but time will tell..
At least the good data I got from the test was that with a battery at 12.0V, the stock VP fan consumes approx. 4.9A when running unrestricted, and the new fan was at 1.9A.
Regarding the taillights, they are also from "Biltema".

They have 3 features; Running lights, brake lights and turn signal/indicators.
They are sold as universal L/R, and intended to use one for each side. But due to the available space allocated for the taillights on the VP I went with two on each side and made a backing plate out of black plastic. These lights are intended for trailers and not approved for use on cars (at least not here), so I kept the original connectors and mounting points, and are able to switch back to the stock taillights in case there is a chance to get the VP approved / registered. So no irreversible damage was done to the stock setup, except for 8 small holes where the new laps are fixed to the VP by screws going through the backing plates and into the fiberglass.
(Edit: Updated links)
-Andy-
NorAndy- Messages : 13
Date d'inscription : 12/02/2020
propylene aime ce message
Re: VP 2025 - No. 311 Restoration
par NorAndy Lun 1 Nov 2021 - 18:52
Some progress has been made.
The left side brakes has been sticking since I got the VP, so they were due for an overhaul. I suspect the previous owner at some point filled DOT/Lockheed brake fluid in the LHM system, and now it was pulling to the left.
I have now converted it to use DOT brake fluid. I found a set of caliper gaskets and the small rubber fittings for brake lines that could handle DOT fluid on e-Bay.
I think they were intended for 2CV owners that had a 4 wheel drum brake setup and wanted to convert their front brakes to disks without replacing master cylinder and rear brake pumps, but they were perfect for my goal as well. I replaced the master cylinders and fluid reservoirs, made new copper brake lines, did a caliper clean/overhaul and replaced the brake and parking brake pads.
Upon inspection, the discs seemed fine so I decided to reuse them. (Also new ones was on back-order at my vendor, so there's that..)
Painted the brake and gear levers, and replaced the handles. I found some that was a bit blingy'er that I first intended, but they'll work.

I have also gotten around to paint the top.
Started by masking off the interior. Unfortunately I missed a couple of spots and got two dime-sized white spots on the gray interior, but I will need to address that later.

Now, the last time I painted something larger in the garage, I set up a makeshift paint booth by using the frame and top from a party-tent. Quite time consuming, but with an exhaust fan it did a great job of keeping the overspray away from the rest of the room.

This time around, partly since the VP/job is quite a bit smaller I decided to mask off using the method seen below. Just covering from below the top, over the floor and about 2 meters up on the walls on 3 sides. This reduced the setup time from hours to minutes, and still covered most of the area around.
Clever, right? Right?

Wrong.
About 2 minutes after starting to spray, the floor was so sticky that I could hardly move without bringing the plastic cover with me, tearing it off the walls in the process.
...I think that at this time I should probably point out that I am neither a painter nor mechanic by trade, but that has probably become quite obvious already.
"Learn by doing", I guess.
Well, about half of the stuff in the garage turned a shade of white, but at least the VP was one of those things.

Unmasking is about half the fun of the paint process, and it turned out ok except for those two dime-sized spots as mentioned and a couple of cracks in the gelcoat that I was sure would not show. No biggie, we'll cover those up in a few.

[bad excuse]..also can't have it too pretty after all, then one would not want to go offroading with it.
Ehem, anyway..
I let it sit for a couple of days to flash off / harden, and when I could put my nose on it and take a whiff without any of that "fresh paint smell", I proceeded with the next step.

I have never tried vinyl wrap before, so this was something I was looking forward to. From what I have read, if you apply the wrap too soon after a paintjob, the gasses might start to form under the vinyl and create bubbles. So hopefully I waited long enough.
The original plan was to cover the entire thing in vinyl, but once I received the film I found the pattern to be a bit "busy" and opted for a different design. Hence the green "knifeless tape" in the picture.
There is a couple of the areas I want to redo, but I'll give it some thought first. In the picture below the windscreen, rollbar and engine cover is not bolted down, lights are not wired and so on and so on, but at least its starting to give a indication off the final look.

.

Still a lot left to do, tho.
- Andy -
NorAndy- Messages : 13
Date d'inscription : 12/02/2020
propylene aime ce message
propylene- Admin
- Messages : 1593
Date d'inscription : 08/10/2014
Age : 46
Re: VP 2025 - No. 311 Restoration
par NorAndy Jeu 11 Nov 2021 - 11:18
Thank you.
Hehe, yeah I was not sure about the exhaust, but I have kept the original one in case I need that to get it approved. Just need to drill a new hole in the rear for the exhaust tip, block off the topside holes and reinstall the original parts. None of the original setup was tampered with, except for closing the hole in the fiberglass.
The benefit with this one I think, if any, is that the mufflers has been moved outside the engine room, so there are no "heat reservoirs" there. I will also wrap the exhaust pipes with exhaust bandage, and together that will hopefully help keeping the engine compartment a bit cooler. That being said, I am currently fitting some other exhaust pipes, as these were temporary.
- Andy -
NorAndy- Messages : 13
Date d'inscription : 12/02/2020
Re: VP 2025 - No. 311 Restoration
par NorAndy Jeu 11 Nov 2021 - 21:27
So there has been a couple updates.
I wanted to fit a winch to the 2025, and needed a bracket.
Started by cutting out some parts from a larger metal plate.
I wanted to fit a winch to the 2025, and needed a bracket.
Started by cutting out some parts from a larger metal plate.

A lot of measurements and test-fitting was involved, but ended up with this set. (+one for the front, which is not in the picture)

All welded together, used a regular MMA machine and a lot of clamps to keep it in line while working.

Trimmed the edges a bit, and cut of a bolt and welded in place as one of the winch mounts.
This would not have fitted a head underneath, so ended up with this.

All good to go, primed and spraypainted with...
...you guessed it..
bedliner!

I made the bracket in 2 pieces, so that I could remove the main part without messing with silicone/waterproofing when taking the winch off. It might be necessary for approval, so I opted for this solution.
Actually its more like a 3-piece, as there is also installed one plate on the inside that will hopefully pick up the load when using the winch. I will have to try carefully a few times at first, and perhaps upgrade it if needed. I think the winch will mostly be used to pull the front end slightly onto land when trying to climb out of ditches and such, so I think it should be OK.
Adapter installed, bolted through the hull and trough a plate in the inside with 4x M8 bolts.

Winch and LED bar fitted and connected.

Next up was the headlights. I wanted to change them a bit, but might need to keep the originals for the approval so nothing irreversible.
I have seen these that I really liked on this forum, but not sure where to get them or if its even possible.

So I figured I would try to make some similar ones myself.

Started with some 3mm polycarbonate plates, headlight tint film, black aluminum L-bars, a set of stainless steel screws and... some black door handles, because why not.
Took me a while to find a set of handles I liked the shape of, but e-Bay came through in the end. All the screws I had was too long and had to be cut. L-bars was cut, shaped and each drilled 6 holes into.
Each side is 21pieces, "some assembly required".
Tinted the poly plates and predrilled holes. Tint is "smoke".

Added new rubber gasket/liner to the headlight

And hey, presto.

I have started on a new light-switch bracket, engine cover setup and finalizing the exhaust as well, but not quite done yet.

More on that later.
- Andy -
NorAndy- Messages : 13
Date d'inscription : 12/02/2020
propylene aime ce message

propylene- Admin
- Messages : 1593
Date d'inscription : 08/10/2014
Age : 46
» [lbc] VP2025 (?) jaune sans carte grise
» VP 2025 allemagne
» mon Poncin 2025
» VP 2025 LBC 5500E
» VP 2025 de Propylene
» VP 2025 allemagne
» mon Poncin 2025
» VP 2025 LBC 5500E
» VP 2025 de Propylene
Page 1 sur 1
Permission de ce forum:
Vous ne pouvez pas répondre aux sujets dans ce forum|
|
|